Ergonomic Workspace Setup for Remote Work Efficiency: A Practical Guide
Remote work can feel great until your neck tightens, your wrists ache, and your focus slips by mid-afternoon. That’s not a willpower problem. It’s often a setup problem.
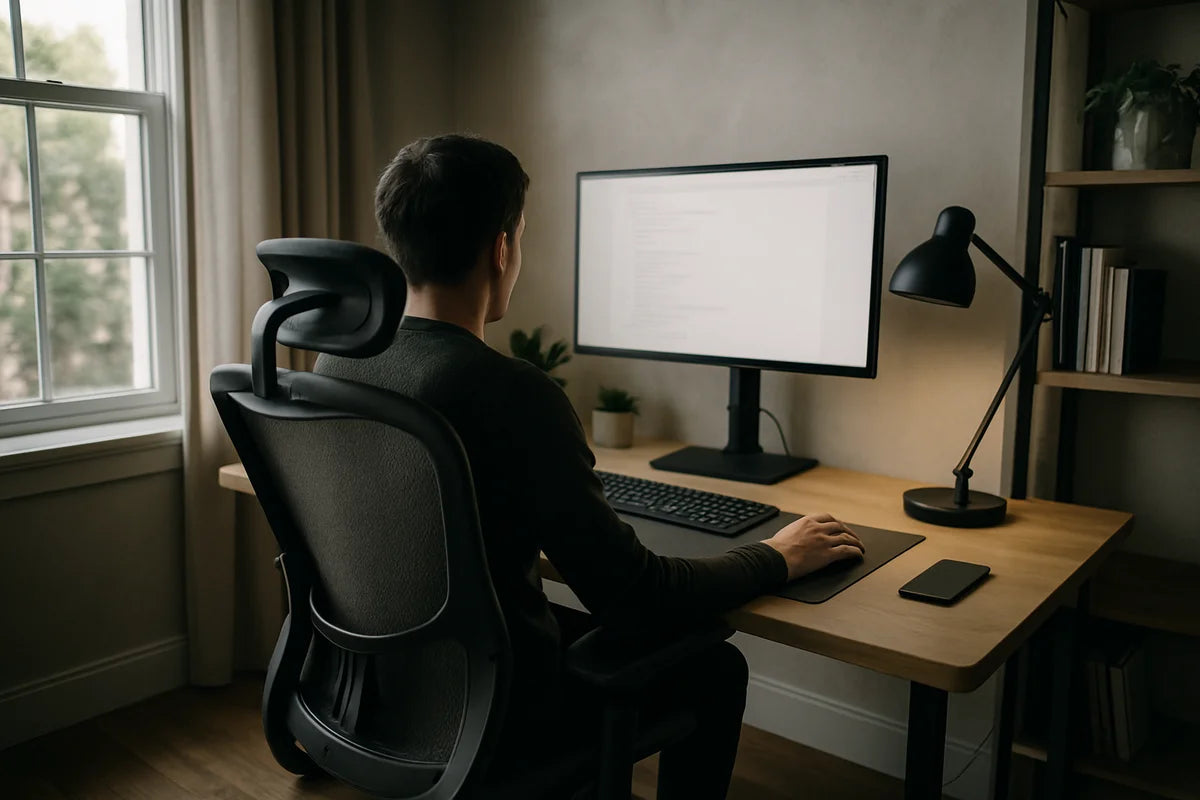
An ergonomic workspace setup for remote work efficiency isn’t about fancy gear or a picture-perfect desk. It’s about fitting your space to your body so you can work longer with less strain and fewer breaks forced by pain. This guide walks you through a simple, step-by-step setup you can do with what you have, plus smart upgrades if you want them.
What “ergonomic” really means (and why it boosts efficiency)

Ergonomics means you arrange your tools and posture to reduce strain. When your desk fits you, you waste less energy fighting discomfort. You move less, fidget less, and you can stay in a task longer.
Ergonomics also lowers your risk of common work problems like back pain and wrist irritation. The OSHA ergonomics guidance explains how awkward postures and repeat motions add up over time, especially at a computer.
Start with the basics: posture you can hold
You don’t need a “perfect posture.” You need a posture you can keep without tension.
Use this simple posture checklist
- Feet rest flat on the floor (or on a stable footrest).
- Knees sit around hip height, or a touch lower.
- Lower back feels supported, not arched.
- Shoulders relax down, not shrugged.
- Elbows stay close to your sides and bend around 90 degrees.
- Wrists stay straight while typing and mousing.
- Head stays balanced over your shoulders, not reaching forward.
If you read that list and think, “I can’t get there with my current chair,” that’s normal. Most dining chairs weren’t built for hours of keyboard work. You can still fix a lot with small adjustments and a couple of low-cost supports.
Chair setup: the anchor of an ergonomic workspace
Your chair sets your hip height, back support, and arm position. Get it close, and the rest gets easier.
Set chair height first
Raise or lower your chair so your feet sit flat and your knees don’t lift higher than your hips. If your chair is too high and you can’t lower it, add a footrest. A sturdy box works better than a soft ottoman because it won’t wobble.
Support your lower back
If your chair lacks lumbar support, use a small cushion or a rolled towel at your lower back. Place it where you feel the curve of your spine, not up in the mid-back.
Clinical guidance on neutral sitting and back support often points to keeping the spine supported and avoiding slumped posture. The Cleveland Clinic’s ergonomics overview gives a clear, plain-English explanation of why this matters.
Armrests: help or hazard?
Armrests can reduce shoulder load, but only if they fit under your desk and let your elbows rest near your sides. If armrests force your shoulders up, lower them or remove them. If they bump the desk and push you forward, they work against you.
Desk height: match it to your elbows
Most people set their chair for their legs, then accept whatever desk height they get. That’s how wrists and shoulders get irritated.
The quick desk height test
Sit with relaxed shoulders. Let your elbows bend around 90 degrees. Your keyboard should sit at about that height. If your desk is too high, you’ll raise your shoulders or bend your wrists up. If it’s too low, you’ll collapse forward.
- If the desk is too high: raise your chair, then add a footrest so your feet stay supported.
- If the desk is too low: raise the desk surface with stable risers, or use a keyboard tray if you have one.
If you want a reference for typical workstation measurements and how they scale to body size, Cornell’s ergonomics resources are a solid starting point, including setup basics from the Cornell University Ergonomics Web.
Monitor placement: fix neck strain fast
If you work on a laptop all day, your screen sits too low. Your neck pays the price.
Set monitor height and distance
- Top of the screen sits around eye level (a bit lower is fine).
- Screen sits about an arm’s length away.
- Center the monitor with your body, not off to the side.
For bifocals or progressive lenses, you may need the monitor a bit lower to avoid tipping your head back. Aim for “chin level and relaxed,” not “head tilted.”
Laptop fix: separate the screen from the keyboard
A laptop stand plus an external keyboard and mouse is one of the best upgrades you can make for ergonomic workspace setup for remote work efficiency. If you only change one thing, make it this.
- Raise the laptop screen with a stand or a stack of stable books.
- Use an external keyboard at elbow height.
- Use an external mouse so your shoulder and wrist stay neutral.
Keyboard and mouse: protect your wrists and shoulders
Hand and forearm discomfort often comes from small, repeated angles held for hours. Tiny changes help a lot.
Keyboard placement tips
- Keep the keyboard close so you don’t reach.
- Let your wrists float, or rest lightly between bursts of typing, not while you type.
- If your keyboard has feet, try them down first. A flat keyboard often keeps wrists straighter.
Mouse setup tips
- Keep the mouse close to the keyboard.
- Move from your elbow and shoulder, not by bending your wrist side to side.
- If you grip hard, lower mouse sensitivity so you can move less.
If you want a deeper look at office ergonomics, including hand positioning and screen setup, the Mayo Clinic’s office ergonomics guide lays it out clearly.
Lighting and glare: reduce eye strain and headaches
Eye strain doesn’t just make your eyes tired. It can drag down focus and make tasks feel harder than they are.
Use light placement, not brightness, to solve most problems
- Place your screen sideways to a window, not facing it and not with the window behind it.
- Add a desk lamp for task light instead of cranking overhead lights.
- Adjust screen brightness to match the room, not max it out.
For practical guidance on glare, screen comfort, and lighting, the American Optometric Association’s computer vision guidance is a useful reference.
Noise and focus: build a space your brain can use
Efficiency isn’t only physical. Your environment shapes how long you can stay focused.
Simple ways to cut distractions
- Face a wall or a simple background if possible.
- Use a consistent “work sound,” like a fan, soft music, or noise-canceling headphones.
- Keep your phone out of reach during focus blocks.
If you take a lot of calls, a headset can help more than you think. It keeps your neck from tilting while you pin a phone to your shoulder, and it makes your voice clearer for others.
Movement: the missing part of most home setups
Even a great ergonomic workspace setup for remote work efficiency won’t save you if you hold one position for hours. Your body needs change.
Use “position switching” instead of long stretch sessions
Short, frequent moves beat one long break. Try this:
- Every 25 to 45 minutes, stand up for 30 to 60 seconds.
- Do 5 slow shoulder rolls or scap squeezes (pull shoulder blades back and down).
- Reset your posture when you sit.
If you want a simple timer tool, the Pomofocus Pomodoro timer makes it easy to build breaks into your day without overthinking it.
Micro-moves you can do without leaving your desk
- Neck reset: gently tuck your chin back, hold 3 seconds, repeat 5 times.
- Wrist reset: open and close your hands 10 times, then shake them out.
- Hip reset: sit tall and squeeze your glutes for 5 seconds, repeat 5 times.
Small upgrades that make a big difference
You don’t need to buy everything at once. If you want to spend money, spend it where it removes the most strain.
Best “value per comfort” upgrades
- External keyboard and mouse (especially for laptop users).
- Laptop stand or monitor riser.
- Supportive chair, or at least a lumbar cushion and a firm seat pad.
- Footrest (or a stable box) if your feet don’t sit flat.
- Headset if you’re on calls for hours.
What to skip unless you know you need it
- “Ergonomic” gadgets that lock you into one posture.
- Cheap chairs with lots of knobs but weak support.
- Wrist rests used while typing (they can increase pressure on the wrist).
If you want a practical checklist and setup diagrams, this Wirecutter guide to setting up an ergonomic workspace is a helpful, product-light overview with clear visuals.
Room-by-room setups: make it work in real homes
Not everyone has a home office. Here’s how to adapt common spaces.
Kitchen table setup
- Add a seat cushion to raise your hips if the table is too high.
- Use a footrest so your legs stay supported.
- Raise your laptop and use external input devices.
- Pack it into a bin at the end of the day so the table stays usable.
Couch setup (best kept short)
- Limit couch work to quick tasks like email.
- Use a firm lap desk and a pillow behind your lower back.
- Avoid long typing sessions with a bent neck.
Small-space corner setup
- Use a narrow desk or wall-mounted surface at proper elbow height.
- Mount a monitor arm if you need desk space for notes and tools.
- Store cables and gear vertically to keep the floor clear.
A 10-minute ergonomic reset you can do today
If you feel overwhelmed, do this in order. It covers the biggest wins fast.
- Set chair height so feet sit flat and knees sit near hip level.
- Add lower back support (towel or cushion).
- Move keyboard and mouse close, at elbow height.
- Raise your screen so you don’t look down all day.
- Fix glare by turning your desk or shifting the monitor angle.
- Set a timer to stand once every 30 to 45 minutes.
Conclusion
An ergonomic workspace setup for remote work efficiency comes down to fit. Fit your chair to your legs, your desk to your elbows, and your screen to your eyes. Then add movement so your body doesn’t get stuck.
If you make one change this week, raise your laptop screen and use an external keyboard and mouse. If you make two, add proper back support and a break timer. Small changes done well beat a full desk makeover you never maintain.

