How to Build a DIY Moss Wall Air Purifier With Fan (That Actually Makes Sense)
A moss wall looks great. It can also help with sound and humidity. But can it clean your air like a real purifier? Not in the same way a HEPA filter can. Still, you can build a DIY moss wall air purifier with fan that moves air across a large, textured surface, traps some dust, and adds a calm, green focal point to a room.
This guide shows you how to build one safely, what it can and can’t do, and how to get the best results without wasting time or money.
What a moss wall air purifier can (and can’t) do

Before you cut wood or buy a fan, get clear on the goal.
What it can do well
- Move air through a decorative wall panel so air in the room circulates more
- Catch some larger dust particles on a pre-filter and textured surfaces
- Add a small humidity buffer if you use live moss (but live moss indoors is tricky)
- Reduce perceived “stale air” by increasing mixing and airflow
- Look far better than a plastic box purifier
What it won’t do (be honest about this)
- It won’t replace a HEPA purifier for smoke, allergens, or fine particles
- It won’t reliably remove gases or odors unless you add activated carbon
- It won’t “oxygenate” a room in any meaningful way
If you deal with asthma, wildfire smoke, or heavy allergies, use a proper purifier. The EPA’s guidance on air cleaners and filters lays out what works and what doesn’t.
Design choices: preserved moss vs live moss
You have two main paths. One is easy and low risk. The other needs care.
Preserved moss (recommended)
Preserved (stabilized) moss is real moss treated so it stays soft without water or light. It won’t grow. It also won’t need misting, which matters because moisture plus a fan can turn into mold fast.
- Pros: low upkeep, no watering, stable shape, less mold risk
- Cons: doesn’t act as a humidifier, can cost more
Live moss (only if you want a plant project)
Live moss needs steady moisture, the right light, and airflow that doesn’t dry it out. Many indoor spaces aren’t a good fit. If you go live, treat the “air purifier” part as secondary and focus on plant health and mold control.
- Pros: living surface, can buffer humidity a bit
- Cons: needs moisture management, higher mold risk, more maintenance
If you want to understand indoor pollutants and why plants alone don’t solve them, the World Health Organization’s overview of air pollution and health is a useful baseline.
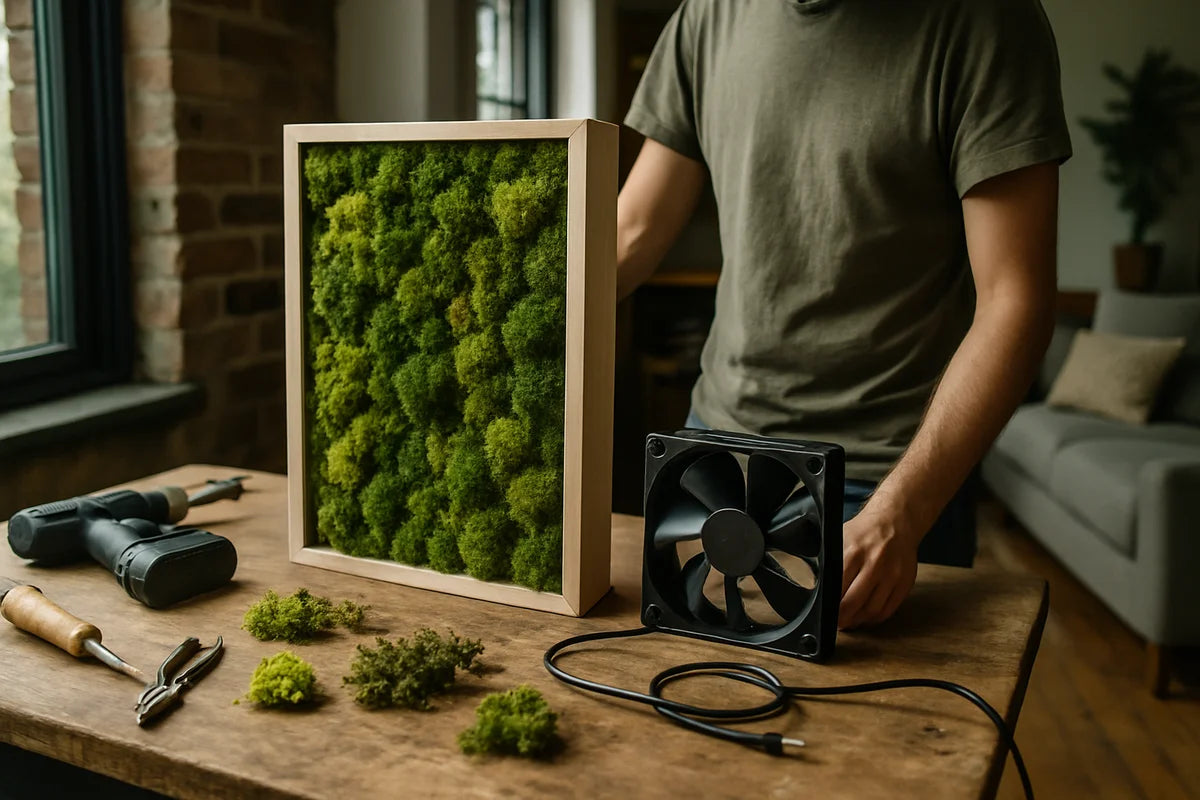
How the DIY moss wall air purifier with fan works
The basic idea is simple: a quiet fan pulls room air through a front panel. Behind that panel, you place a pre-filter (to catch fuzz and dust) and an optional carbon layer (for mild odor help). The moss sits on the front as the visible finish, but the hidden filter layers do most of the “cleaning” work.
Think of it as a hybrid: part wall art, part low-power air mover with light filtration.
Best use cases
- Bedrooms where you want quiet airflow and a softer look
- Home offices that feel stuffy
- Entryways where you want a statement piece
Not a great fit
- Kitchen zones with grease in the air
- Bathrooms (humidity swings and water exposure)
- Any room with known mold issues
Materials and tools (with practical options)
You can build this with basic tools and off-the-shelf parts. The list below assumes a wall panel around 24 x 36 inches. Scale up or down if you like.
Core materials
- Frame: 1x3 or 1x4 wood, or a shallow plywood box
- Backer board: thin plywood or rigid PVC sheet
- Front grill layer: wood slats, perforated hardboard, or a router-cut panel
- Pre-filter: cut-to-fit HVAC filter media (MERV 6-8 works well for airflow)
- Optional carbon layer: activated carbon pre-filter sheet
- Fan: quiet 120 mm to 200 mm DC fan, or a slim inline duct fan for more pull
- Power: DC adapter matched to the fan voltage (often 12V)
- Moss: preserved sheet moss, reindeer moss, or mixed preserved moss
- Adhesive: hot glue for preserved moss, or contact adhesive rated for crafts
- Mounting hardware: French cleat or heavy-duty wall anchors
- Optional: fan speed controller (inline) to tune noise vs airflow
Tools
- Drill and bits
- Saw (hand saw, circular saw, or miter saw)
- Staple gun or small screws
- Wire strippers (if needed for fan wiring)
- Measuring tape and square
Want to size airflow with more confidence? Use a practical calculator like Omni’s CFM calculator to sanity-check how much air you’re moving for your room size.
Step-by-step build: a clean, safe layout
This build uses a “pull-through” design: the fan pulls air through the filter and exhausts out the back or sides. It keeps the moss from getting blasted by airflow and helps the filter do its job.
1) Pick a size and plan airflow
A good starter size is 24 x 36 inches with a 2.5 to 4 inch deep frame. Bigger gives you more filter area, which means less resistance and less noise.
- For a small bedroom, aim for 50-150 CFM of real airflow on a quiet setting.
- If you use a tiny PC fan, you’ll get low airflow but near-silent sound.
- If you use an inline duct fan, you’ll get more airflow but need better muffling.
If you want a reality check on why airflow matters, look at how CADR relates to cleaning speed. AHAM explains the basics in its CADR overview.
2) Build the frame
- Cut wood to make a rectangular frame.
- Screw it together and check it’s square.
- Add a center brace if the panel is wide, so it won’t twist on the wall.
Keep the frame depth deep enough to hold your filter layers without crushing them. Filters need air gaps.
3) Add the backer and plan the exhaust
- Attach the backer board to the frame with screws.
- Decide where the air exits: out the back (needs wall spacing) or out the sides (cleaner wall fit).
- If exhausting out the back, add 1/2 inch spacers or a cleat that creates a gap behind the unit.
If you exhaust out the sides, cut two long slots near the top edges. Hot air rises, and a top-side exhaust often feels smoother in the room.
4) Install the fan (quiet matters)
- Cut a fan opening in the backer board (or mount the fan over a hole).
- Use rubber grommets or foam tape to reduce vibration.
- Wire the fan to a matching DC adapter, and test it before you close anything up.
Choose a fan made for low noise. Look for specs that list decibels (dBA) and airflow (CFM). If you want a deeper dive on what fan ratings mean and how static pressure affects airflow through filters, this guide from AC Service Tech on static pressure explains the concept in plain terms.
5) Add the filter layers (this is where cleaning happens)
- Create a simple filter rack: thin wood strips or a stapled-in ledge that holds the filter sheet flat.
- Place the pre-filter layer first (closest to the front).
- Add an activated carbon sheet behind it if you want some odor help.
- Make sure you can remove and replace these layers without ripping the moss off.
Don’t overdo filtration. If you cram in dense filters, airflow drops and noise rises. A broad, low-resistance pre-filter often works best for this style of DIY moss wall air purifier with fan.
6) Build the front panel so air can pass
You need a face that looks good and still lets air in.
- Wood slats with 1/4 to 3/8 inch gaps look clean and flow well.
- Perforated panels work, but they can whistle if holes are small.
- A routed pattern looks great if you have the tools.
Attach the front panel with screws so you can open it later for filter changes.
7) Attach the moss without blocking airflow
This is where most DIY builds go wrong. If you pack moss into every opening, you choke airflow and turn the fan into a noisy heater.
- Lay out moss in clusters, leaving the main intake areas open.
- Glue moss to solid parts of the front face, not across air gaps.
- Use small amounts of adhesive. Too much glue can smell and can harden the moss.
If you want a more “full wall” look, keep a hidden intake zone along the bottom or sides and put dense moss where air isn’t meant to flow.
8) Mount it safely on the wall
- Use a French cleat for a stable mount and easy removal.
- If you can’t hit studs, use heavy-duty anchors rated above the unit’s weight.
- Route the power cable neatly and keep it away from pinch points.
How to get better air results (without pretending it’s HEPA)
Want this project to do something useful beyond decor? Focus on airflow, filter area, and placement.
Put it where air moves
- Near (but not blocked by) a doorway so it catches mixed air
- A few feet from the bed so you feel gentle circulation at night
- Avoid corners where air sits still
Use a simple test to check airflow
- Hold a strip of tissue near the intake zones. It should pull in steadily.
- If the fan sounds strained, reduce filter density or increase intake area.
Pair it with the stuff that really works
If you want real particle removal, use a standalone HEPA purifier too, or build a proven DIY unit like a box fan filter. The UC Davis testing on DIY air purifiers gives a grounded look at what works for particle cleanup.
Maintenance: keep it clean, quiet, and not gross
A moss wall only stays nice if you maintain it. The good news: preserved moss makes this easy.
Filter replacement schedule
- Pre-filter: every 4-8 weeks in most homes, sooner with pets
- Carbon sheet (if used): every 2-3 months, or when odors come back
Dust control
- Use a soft brush or a hair dryer on cool, low setting to lift dust off preserved moss.
- Don’t vacuum moss directly unless you test a small spot first.
Mold and moisture safety
- Don’t mist preserved moss.
- If you use live moss, keep a hygrometer nearby and watch for damp smells.
- If anything smells musty, stop the fan, open the panel, and inspect the filter and interior.
Common mistakes (and how to avoid them)
- Blocking the intake with moss: leave clear paths for air to enter.
- Using a dense furnace filter: high MERV filters can choke small fans.
- Mounting flush to the wall with rear exhaust: leave a gap or vent to the sides.
- Skipping access panels: you will replace filters, so plan for it.
- Running it loud: a quieter unit runs more often, which helps more than short loud bursts.
Simple upgrade options
Add a basic air quality monitor
A small PM2.5 monitor helps you see whether changes make a difference, especially during cooking or smoke events.
Use a fan controller
A $10 speed controller can cut noise and let you run the unit all day.
Build a bigger filter area
If you want better performance, go bigger, not denser. More surface area usually beats a tighter filter in a small DIY build.
Conclusion
A DIY moss wall air purifier with fan works best when you treat it as a quiet airflow and light-filtration project with a green finish. Build it around a removable pre-filter, keep the air paths open, and mount it so it can breathe. You’ll end up with wall art that also helps the room feel fresher, and you’ll avoid the common trap of expecting moss to do a HEPA filter’s job.